February 12, 2013
Hard-Surface Model - Final Image
The second project of my independent study involved texturing and lighting the hard-surface model of the vehicle to create a final, final image. This project was the first time that I was really exposed to shading and texturing, having only learned how to do UV layout at the beginning of the quarter. I utilized many shading networks in Maya to create the various textures of the car, and used color, specularity, bump, and displacement maps where needed for items like the tires, the roof of the car, the plastic of the bumpers and headlights, and the Jeep logo.
While I had done basic, amateur lighting in the past, I also took this opportunity to learn more about three-point lighting (with the addition of lights as necessary), and which lights should be more or less intense, and more or less warm. The positioning of the lights was also key, as I was not only trying to light my subject in a flattering way, but I was also attempting to replicate lighting from the photograph I chose to composite in the final image.
On that note, I saw this project as a significant opportunity to be introduced to compositing and expand my knowledge of the program Nuke. Once the Jeep had its final textures and lighting in Maya, multiple passes were rendered out to be composited on top of one another in Nuke, and make the positioning of my CGI vehicle onto a photograph more believable. I look forward to gaining more experience with Nuke and compositing, so that I can feel comfortable enough with the process and apply it to many projects in the future. Compositing is an interesting way to get to a final image without having to model an environment or attempt to create a realistic-looking environment by using bump and displacement maps (as proven in an image below).
 |
| The displacement map of the tires in Photoshop, as laid out by the UV Texture Editor in Maya. The UV layout was taken as a "UV Snapshot" and brought into Photoshop to be detailed. |
 |
| A close up of the Jeep logo on the tire hubcap. The image was rendered with a crop box around the central part of the logo, to show my experimentation with the scale of the bump. |
 |
| a close up of the "flakes" that come standard with the car paint material |
 |
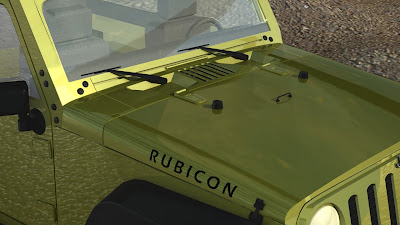
| A preliminary "final" image that started out earlier in the week. I exercised my newly acquired texture mapping skills by applying a displacement map of gravel to the ground I created for Project 1. |
 |
| The "Master Layer", in mid-render. This image was used in the Compositing process. |
 |
| The "Ambient Occlusion" pass, also used in the Compositing process. |
 |
| The "Shadow" pass, used in Compositing to recreate or replicate the shadow of the object in Maya in the 2D image. |


This is really great! I love all the passes, and your compositing is awesome!
ReplyDelete